In this article, we will look at how to enable Memcached or Redis on WordPress with LiteSpeed Cache.
Prerequisites
Enter the following address in your web browser: https://mg.n0c.com/en/.
Procedure
The procedure is similar for Memcached and Redis.
- Activate Memcached or Redis, as appropriate, as explained in How to use Memcached and How to use Redis respectively.
- Take note of the path to the Linux socket to establish the link between Memcached or Redis and your web application (path /home/USERN0C/.memcached/memcached.sock for Memcached, or /home/USERN0C/.redis/redis.sock for Redis):

- Log in to your WordPress Dashboard and click on Plugins -> Installed Plugins:
- Make sure the LiteSpeed Cache plugin is installed in WordPress :
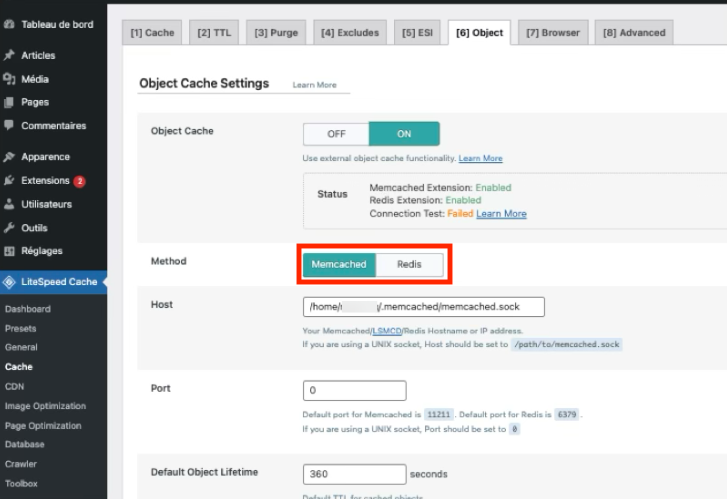
- Navigate to the LiteSpeed Cache Object Cache Settings, click on the [6] Object tab and choose the ON option next to Object Cache:
- Choose the Method (Memcached or Redis) :
- In the Host field, enter the path you noted in step 2:
- Put 0 for the Port :
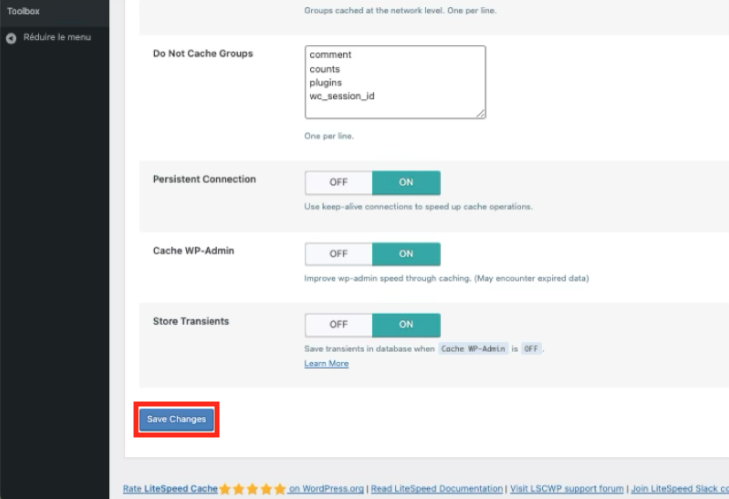
- Save the configuration by clicking on the Save Changes button:
- Finally, make sure that LiteSpeed indicates that Memcached or Redis has passed the Connection Test, which confirms that the activation of Redis or Memcached in LiteSpeed Cache for WordPress is complete:


