The Akeeba Backup plug-in is an invaluable tool for securing your Joomla! environment, enabling you to easily store your backups on N0C Storage. All you need to do is adjust a few parameters to use Amazon’s S3 protocol.
In this article, we explain how to download a prefabricated configuration file which, once imported into Akeeba, should immediately enable you to classify your files in N0C Storage by connecting directly to S3. However, if you are having trouble with this, you will need to configure it manually, which is also detailed in the article.
Prerequisites
Access to https://mg.n0c.com/en/.
Importing the Prefabricated Configuration File
Before manually configuring Akeeba, you can import a prefabricated configuration file. This can be found in the QUICK SETUPS section of the N0C storage interface on your MG control panel (this section is described in the article How to Use N0C Storage):

Simply download the Configuration.json file and import it into Akeeba Backup.
Manual Configuration
The following steps explain in detail how to configure Akeeba manually if the configuration file does not work.
Step 1: Get your N0C Storage Settings
Before performing Akeeba Backup configuration, you will need to collect some essential data from your N0C management interface. Go to Files, then click on N0C storage. Here you will find the information you need to configure Akeeba: access key, secret key, bucket name and region.

Step 2: Set up the Akeeba Backup Destination
Now that you have all the information you need, it’s time to go to the Components section of your Joomla! control panel. From there, select Akeeba Backup for Joomla!. To access the Akeeba configuration interface, click on Control Panel in the menu:

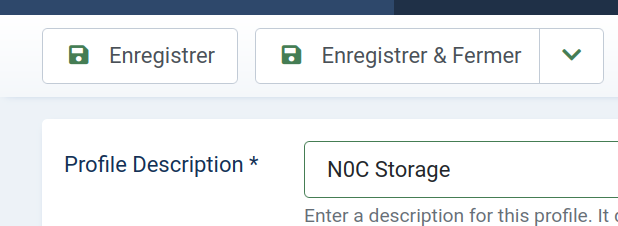
Step 3: Create the Backup Profile
The next step is to create a new backup profile:
- Click on Profiles Management :

- Click on Nouveau (New) :

- Assign a relevant description to this profile in the Profile Description field before clicking on Enregistrer & Fermer (Save & Close) :
Step 4: Configure the Backup Profile
Your profile list is now updated with the profile you have just created. To configure it:
- Simply click on the corresponding Configure button:

- Scroll down to the Advanced configuration section. Here, locate the post-processing engine option. In the associated drop-down menu, choose the Upload to Amazon S3 option:

- Following your selection, new configuration options will appear. This is where you will need to enter the N0C Storage connection information collected earlier: access key, secret key and bucket name:
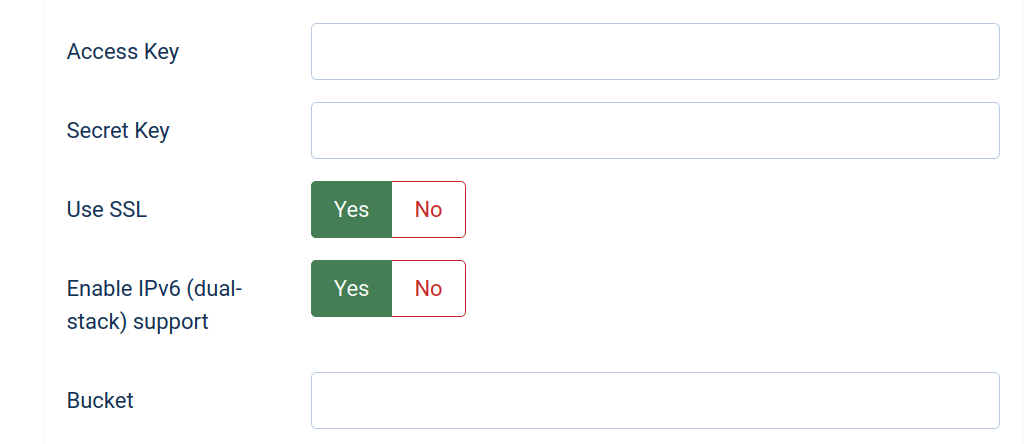
- Finally, be sure to configure the Signature method, Bucket access, Directory, Disable multipart upload, Storage class and Custom endpoint parameters. Most of these parameters must be configured as shown in the following screenshot:

- Do not forget to save your configuration.
Step 5: Run your Backup
All that is left is to launch your backup. On the main screen of the Akeeba extension, you can click on the launch button bearing the name associated with this configuration.

Conclusion
And that is it! You have now completed all the steps necessary to configure your backup destination on N0C Storage using the S3 protocol for the Akeeba Backup extension in Joomla!
It may seem a little technical at first, but with these step-by-step instructions, we hope you have found the process simple and intuitive.
Backing up your data regularly is crucial to the security of your site. N0C Storage and Akeeba Backup make this task easier and more efficient than ever. Remember, good backup management is the key to keeping your site secure and up and running. If you encounter any difficulties or have any further questions, please do not hesitate to contact us.