An email alias is a forwarding address, meaning that all emails addressed to the alias, are forwarded to one or more specified accounts.
In this article, we will show you how to use the Email Alias section for this purpose.
Prerequisites
Enter the following address in your web browser: https://mg.n0c.com/en/.
Definitions
Alias: this is an email forwarding address in the form ALIAS@DOMAIN.EXT.
Forward to: this involves sending the email to one or more email addresses.
Standard: this is a type of redirection where the alias (ALIAS@DOMAIN.EXT) redirects to one or more email addresses.
Catch-All: this is a type of redirection where the general alias (@DOMAIN.EXT), encompassing all non-existent email accounts or aliases, redirects to one or more email addresses.
Save a copy: this indicates that if the alias is also an email account on your hosting, the email is sent to that email account in addition to being forwarded to one or more email addresses defined in the alias.
How to Access to Email Alias
In the Sidebar menu, select Messaging -> Email Alias:

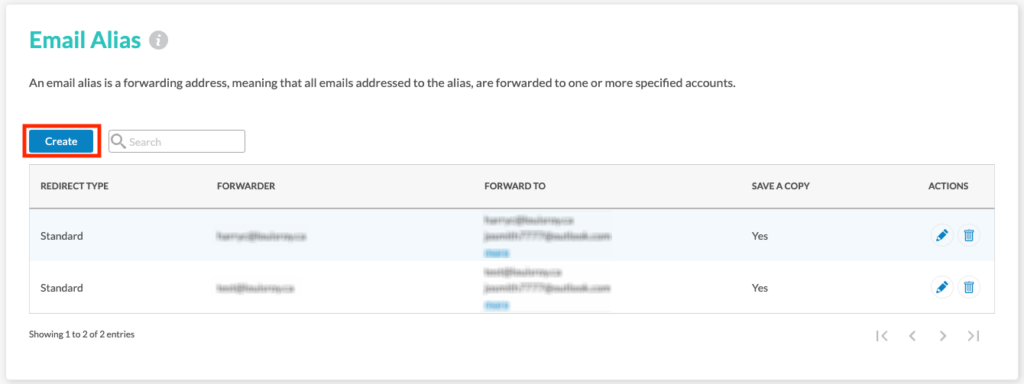
How to Create a Standard Email Alias
- Click on the Create button :
- In the Create an e-mail alias dialog box, select Standard from the CHOOSE A TYPE OF FORWARD drop-down list:
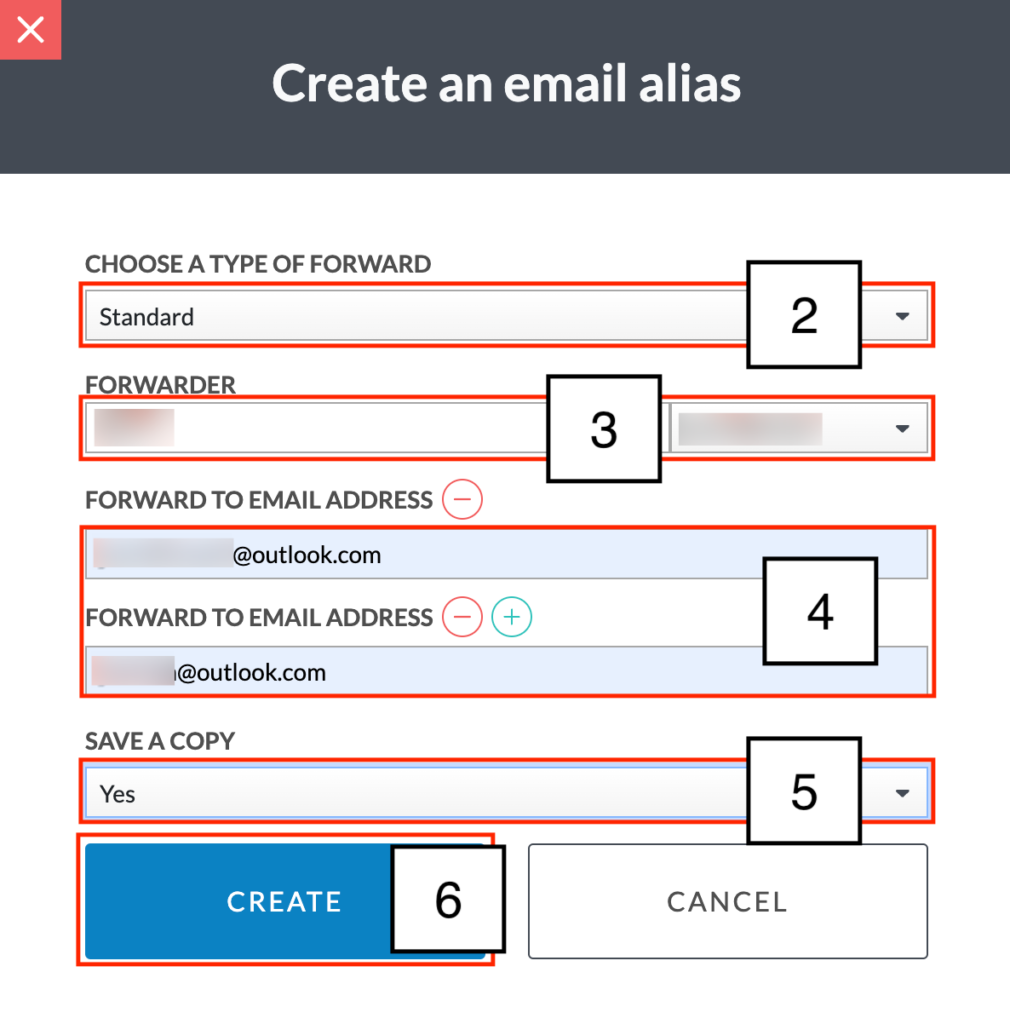
- Enter the name of the FORWARDER, which must be in the form ALIAS@DOMAINE.EXT.
- Indicate to whom the alias should be forwarded in FORWARD TO EMAIL ADDRESS (use the Add icon as many times as necessary).
- If necessary, choose Yes in the SAVE A COPY drop down list.
- Click on the CREATE button.
- A message is displayed to confirm successful creation.
How to Create a Catch-All
- Click on the Create button.
- In the Create an e-mail alias dialog box, select Catchall from the CHOOSE A TYPE OF FORWARD drop-down list:

- Using the DOMAIN drop-down list, specify the domain to which all non-existent accounts or e-mails you wish to redirect belong.
- Indicate to whom accounts or emails should be sent in FORWARD TO EMAIL ADDRESS (use the Add icon as many times as necessary).
- Click on the CREATE button.
- A message is displayed to confirm successful creation.
How to Search for Email Alias
Enter the alias name in the Search field and press Enter key; the alias is displayed:

How to Make Changes
Click on the Edit icon next to the alias to be modified:

Fill in the fields in the Edit one email alias dialog box according to the instructions provided.
How to Remove an Email Alias
Click on the Delete icon next to the redirection you wish to delete:
