This article shows how to configure an email address in Windows Live Mail while it is added in cPanel.
IMAP Configuration
The best way to set up a mailbox in a client software is to set it up as IMAP and not POP3.
Some email providers do not support IMAP. Here, POP and IMAP (+ IOS Push Notifications) are supported.
Step 1 — Open Windows Live Mail and Enter your General Email Account Information
This step is only done if it is the first use. If it is not the case, you must go to the Accounts > Email tab.
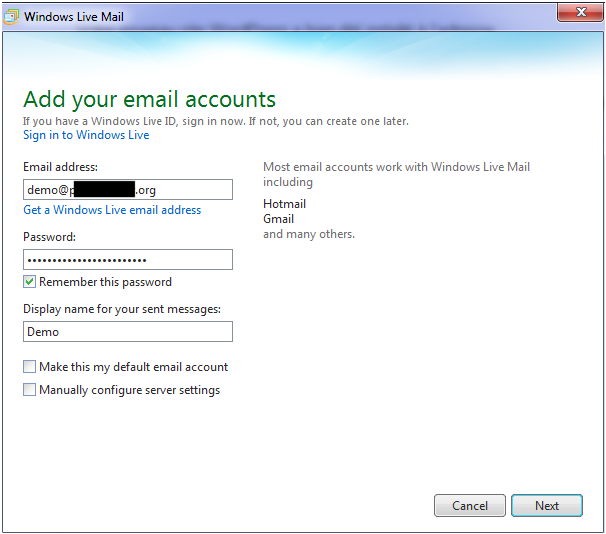
You must fill in the information in this interface:

Email address : your email.
Password : the password to access the mailbox.
Step 2 — Enter Mail Server Settings
You must fill in the information in this interface:

Incoming Server Information
Server type : IMAP.
Server address : incoming mail server. Specify the host name of the server on which you are hosted.
Port : the port for incoming mail is 993.
Authenticate using : choose Clear text.
Logon user name : your email.
Outgoing server information
Server address : outgoing mail server. Specify the host name of the server you are hosted on (this is the same as the incoming mail server).
Port : the port for outgoing mail is 465.