Introduction
The tool allows to manage a blog (post). A blog is a website that contains online personal reflections, comments, and often hyperlinks, videos, and photographs provided by the writer.
In this article, we explain how to add a blog and to manage it.
Prerequisite
Enter the following address in your web browser : https://mg.n0c.com/en.
Open the interface (please see the article How to Create Web Sites).
Adding a Blog Post
- In the Sidebar menu, select Blog -> Add New.
- Using the web page editor, give a title to your blog in the Post Title field:

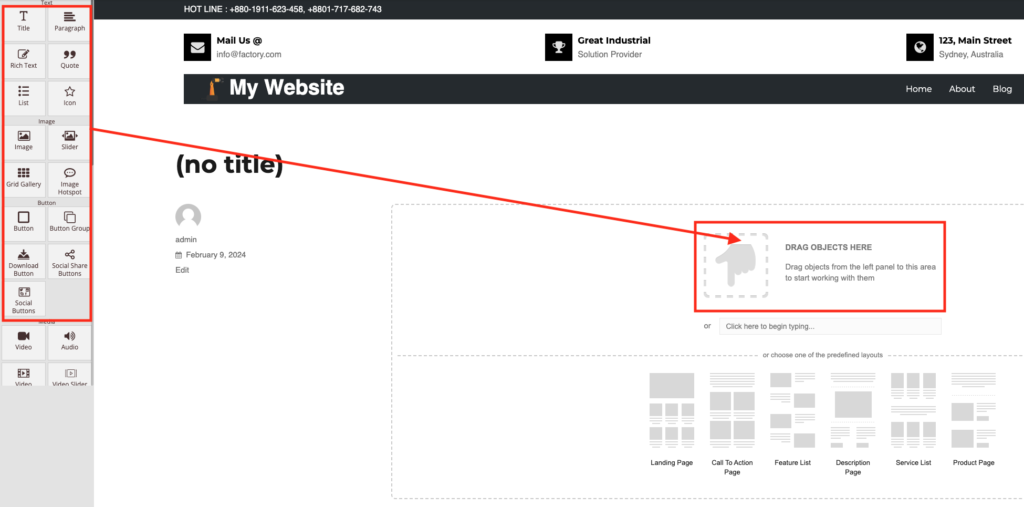
- Drag and drop objects from the Object Bar to start building the layout:
- You can also choose a predefined layout:

- When you have finished the layout of your blog, you can publish it with the Publish button or use the Save button to save the work temporarily to continue later:

Adding Tags to Blogs
A tag (sometimes called a “ label ”) is used to identify a blog. It describes a characteristic of the blog and allows for easy grouping of information containing the same tags.
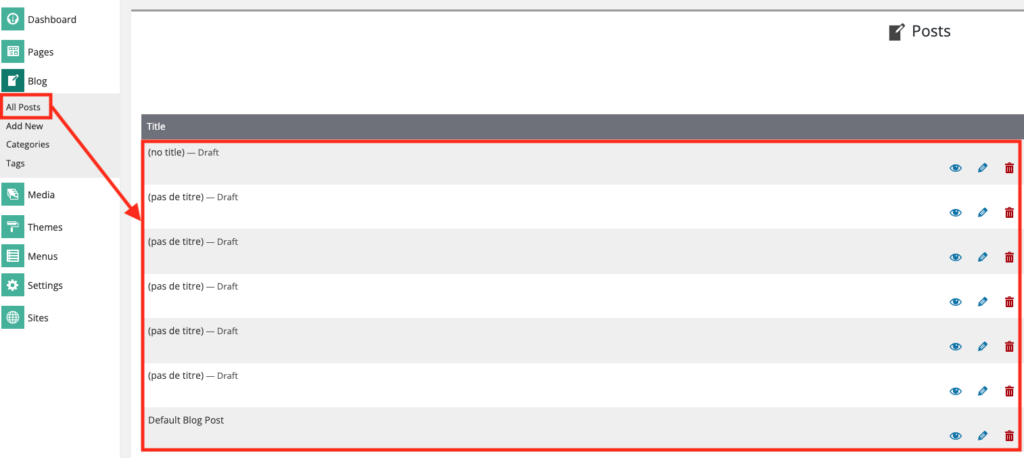
- In the Sidebar menu, select Blog -> All Posts.
- On the line corresponding to the desired post, click on the Edit this item icon:

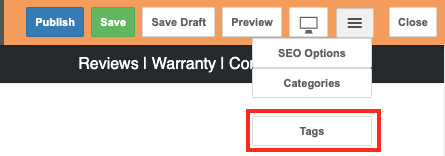
- Once in the page editor, click on the hamburger icon and on Tags:
- In the Tags dialog box, add tags in the text field by separating them with commas:

- Click on the Add and on the Save buttons to apply the changes.
Adding Categories to the Blog Posts
- In the Sidebar menu, select Blog -> All Posts.
- On the line corresponding to the desired tag, click on the Edit this item icon:

- Once in the page editor, click on the hamburger icon and select Categories:

- Enter the name of the desired category and click on Add; repeat to create more categories. The categories are added to the underlying menu so you can assign your posts to them afterwards:
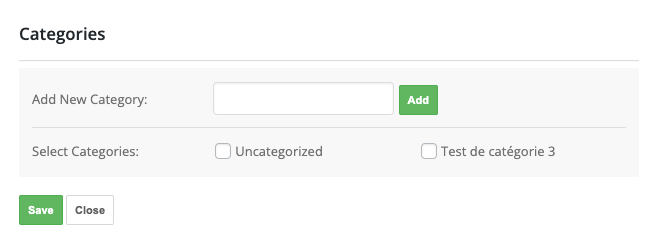
- To change the category of the selected item, check the desired category.
- Click on the Save button.
Previewing Modifications
- You can easily preview changes by clicking on the Preview button:

- If more than one tag has been assigned to a given post, you will see them appear below the publication date:

- If you had assigned the same category to more than two articles, a list of those articles will be displayed when you click on the category.
Displaying the List of Blogs
- In the Sidebar menu, select Blog -> All Posts. The Posts pop-up menu will be displayed and all of your blog posts will appear:
- Search options are available to you, such as:
- The keyword input field and the Search Posts button.
- The drop-down lists for defining Dates and Categories, used with the Filter button.

Editing and Deleting Blogs
If you want modify a blog, click on the Edit this item icon next to the applicable blog post:
If you want to delete a post, click on the Move this item to the Trash icon:

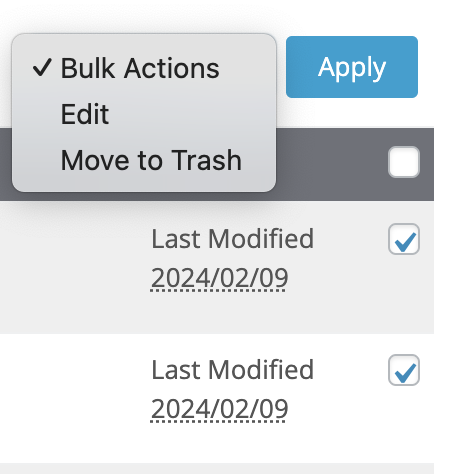
If you wish, you can edit and delete several posts at the same time. To do so, check the checkbox next to the posts which you want to apply the action, click on the Bulk Actions drop-down and choose either Edit or Move to Trash, and click on the Apply button:
Creating Tags for your Blogs
- In the Sidebar menu, select Blog -> Tags and click on Add New Tag:

- In the Add New Tag window, enter the Name, Slug (URL-friendly version of the name), and Description of the tag:

- Click on the Add New Tag button.
Modifying the Tags of your Posts
If you want to modify only the name and the slug of a post:
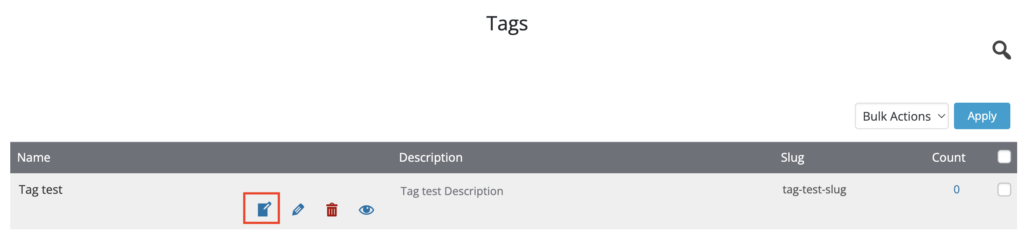
- In the Sidebar menu, select Blog -> Tags.
- The Quick Edit icon opens a window where you can change the Name and Slug of the tag:
- Enter the new name and its slug in the Name and Slug fields:

- Click on the Update Tag button.
If you want to modify all the attributes of the tag :
- In the Sidebar menu, select Blog -> Tags.
- The Edit icon opens a window where you can change all the attributes of the tag:

- Enter the new Name of the tag, its Slug and its Description:

- Click on the Update button.