Introduction
reCAPTCHA is used to verify that you are a human when logging in to an interface or to avoid spams in your mailboxes from contact forms on your website.
This documentation will help you to configure reCAPTCHA for the contact form of your web site.
Prerequisite
Enter the following address in your web browser : https://mg.n0c.com/en.
Open the interface (please see the article How to Create Web Sites).
Having a Gmail account is mandatory to proceed further.
Adding reCAPTCHA in a Contact Form
- Log in to your Gmail account.
- Follow the https://www.google.com/recaptcha/admin/create?hl=en_CA link. You need to register a new site as shown below:
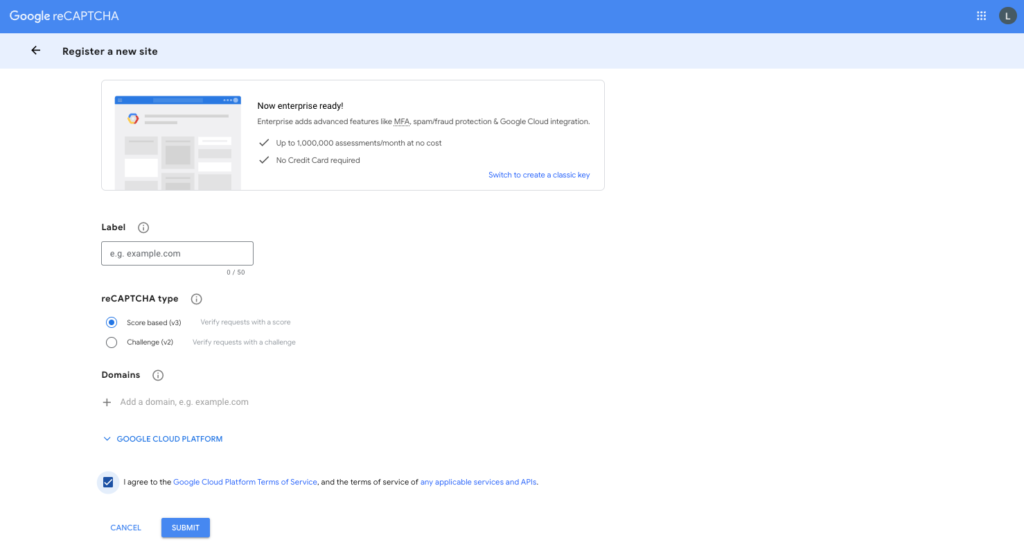
- Add the Label.
- Choose the reCAPTCHA type.
- Add the domain name in Domains (do not specify the www).
- Check “I agree to the Google Cloud Platform Terms of Service, and the terms of service of any applicable services and APIs“.
- To register, click on the blue SUBMIT button.
- Once the site is registered, you will be redirected to a page with the Site Key and the Secret Key. Copy both keys.
- Once you are logged in to the tool, go to Settings -> Contact Form:
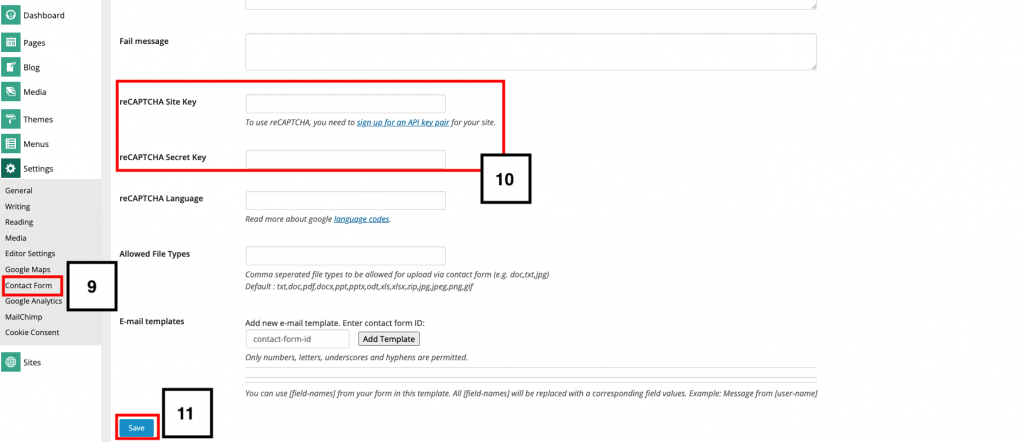
- Copy the keys from the Google reCAPTCHA registration page and paste them in the reCAPTCHA Site Key and the reCAPTCHA Secret Key fields respectively.
- When finished, click on the Save button.
The reCAPTCHA you added is now saved and you can use it for the contact form.